 I just found some time today to post an easy step by step guide to enable you to install the newly released Windows 7 Release Candidate 1 (Win7RC1) NOT directly into your computer since it is a Release Candidate(not a final version) and also, it will expire on June 1, 2010. So the best alternative to test the new Windows 7 RC1 is to install it as a Virtual machine on Virtual PC in your existing Windows XP or Vista.
You will need to download the following stuff to get started.
- Microsoft Windows Virtual PC 2007
- Microsoft Windows 7 Release Candidate 1 (preferably 32 bit version)
Step 1 : Install Microsoft Windows Virtual PC 2007 and run it.
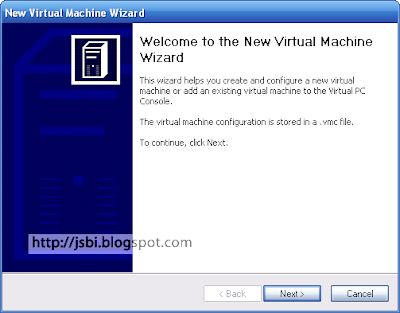
Step 2 : From the Virtual PC console start the "New Virtual Machine" Wizard.
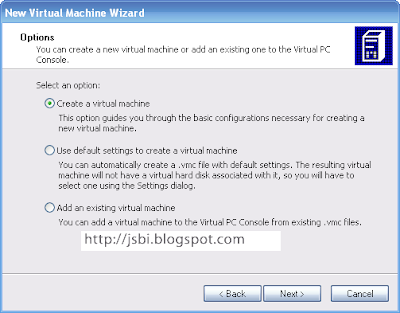
Step 3 : Now select the first option to "Create a virtual machine".
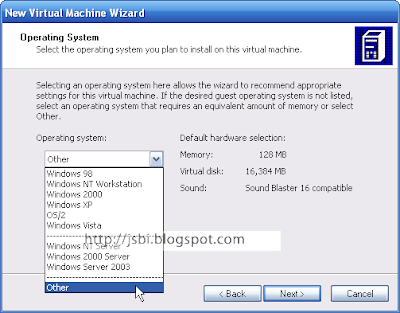
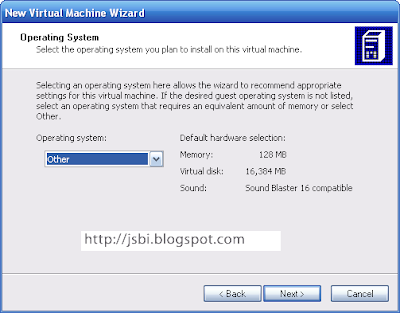
Step 4 : Since we will be installing Windows 7 RC1 (which is the latest kid on the block from Microsoft), so you won't see it figuring in the drop down to select an Operating System. So, go ahead and select "Others".
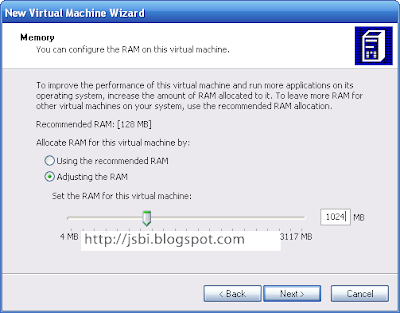
Step 5 : You will now need to adjust the amount of RAM that can be used by the new Win7RC1. Please ensure that you enter 1024 MB or higher. 1024MB == 1GB of RAM.
Step 6 : The next step select a path on your computer hard-disk where the VMC file can be stored. VMC file stores all the configurations that you have set for the Virtual Machine like RAM, etc.

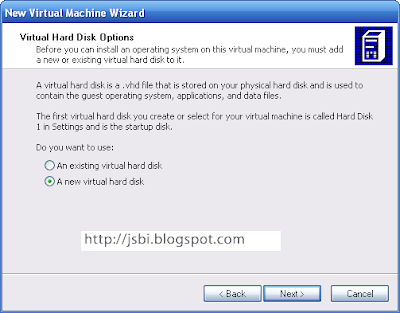
Step 7 : Select the option to use a New Virtual Disk.
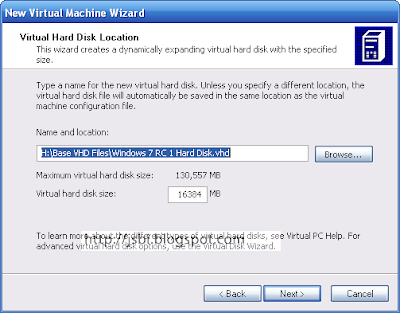
Step 8 : Select the location of the new Virtual Harddisk - This can grow upto 20GB in size, so choose a drive that has the required amount of space.
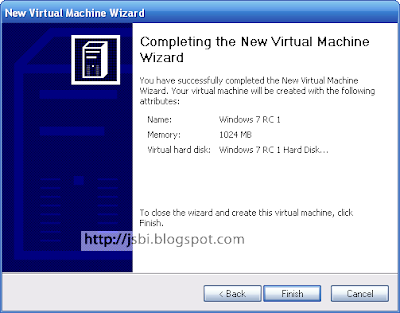
Step 9 : Hit finish and you are done with the configurations.
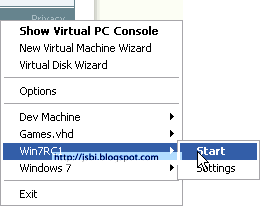
Step 10 : Now head back to the Virtual PC console or the tray icon(next to system clock) and select the newly created virtual machine and hit Start.
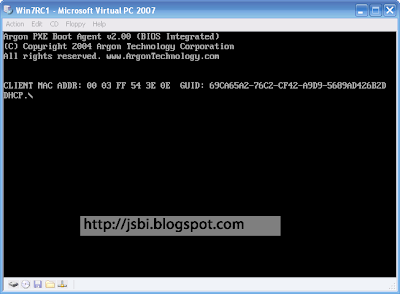
Step 11 : While the Vitrual machine starts up.
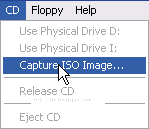
Step 12 : Goto the top menu and select CD > Capture ISO Image
Step 13 : Now browse to the location in your hard disk where the ISO images of Windows 7 RC 1 is stored.
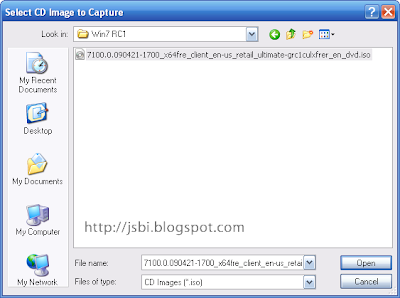
Step 14 : Now the installation Windows 7 RC 1 begins.

Step 15 : The first few screens of the installation will be simple and be self-explanatory. When the installation asks for the type of installation - remember to select “Custom (advanced)” since we are not upgrading from a prior version of Windows and installing afresh.


Step 16 : That's it, you are now ready to go. Whenever you want to take the new Windows 7 for a spin - start your Virtual PC and go ahead and experiment it.
Below are some screens for you to have a sneak peak into the new and improved world of Windows 7.


Step 2 : From the Virtual PC console start the "New Virtual Machine" Wizard.

Step 3 : Now select the first option to "Create a virtual machine".

Step 4 : Since we will be installing Windows 7 RC1 (which is the latest kid on the block from Microsoft), so you won't see it figuring in the drop down to select an Operating System. So, go ahead and select "Others".


Step 5 : You will now need to adjust the amount of RAM that can be used by the new Win7RC1. Please ensure that you enter 1024 MB or higher. 1024MB == 1GB of RAM.

Step 6 : The next step select a path on your computer hard-disk where the VMC file can be stored. VMC file stores all the configurations that you have set for the Virtual Machine like RAM, etc.

Step 7 : Select the option to use a New Virtual Disk.

Step 8 : Select the location of the new Virtual Harddisk - This can grow upto 20GB in size, so choose a drive that has the required amount of space.

Step 9 : Hit finish and you are done with the configurations.

Step 10 : Now head back to the Virtual PC console or the tray icon(next to system clock) and select the newly created virtual machine and hit Start.

Step 11 : While the Vitrual machine starts up.

Step 12 : Goto the top menu and select CD > Capture ISO Image

Step 13 : Now browse to the location in your hard disk where the ISO images of Windows 7 RC 1 is stored.

Step 14 : Now the installation Windows 7 RC 1 begins.

Step 15 : The first few screens of the installation will be simple and be self-explanatory. When the installation asks for the type of installation - remember to select “Custom (advanced)” since we are not upgrading from a prior version of Windows and installing afresh.


Step 16 : That's it, you are now ready to go. Whenever you want to take the new Windows 7 for a spin - start your Virtual PC and go ahead and experiment it.
Below are some screens for you to have a sneak peak into the new and improved world of Windows 7.


No comments:
Post a Comment